Introduction
Have you ever found yourself standing at the grocery store, confused and uncertain as to the best way to prepare an unfamiliar cut of meat, wondering “How should I prepare it?” It happened to me several years ago when I purchased my first beef arm roast; at first, I didn’t know exactly how best to prepare it; later though I developed an easy slow cooking recipe which transforms this affordable piece of beef into an unforgettable flavourful treat!
If you have never attempted cooking a beef arm roast before, prepare to be amazed! This inexpensive yet flavorful cut of meat makes a satisfying comfort meal whether roasted, braised, or slow cooked – ideal whether you are an experienced home chef or looking to branch out. Plus this simple yet straightforward recipe offers loads of great flavors!
I will show you step by step how to prepare an amazing beef arm roast dish, from prep all the way through serving it – including tips to avoid common errors! Perfect for family dinners, special occasions and hearty meal cravings alike – this recipe will have you feeling like an accomplished chef in no time at all.
Key Benefits of Cooking a Beef Arm Roast
Beef arm roast might not be the most glamorous cut of meat, but it has a lot of advantages that make it a great choice for a flavorful, easy-to-make meal. Here’s why you should consider using beef arm roast in your next recipe.
1. Affordable and Flavorful
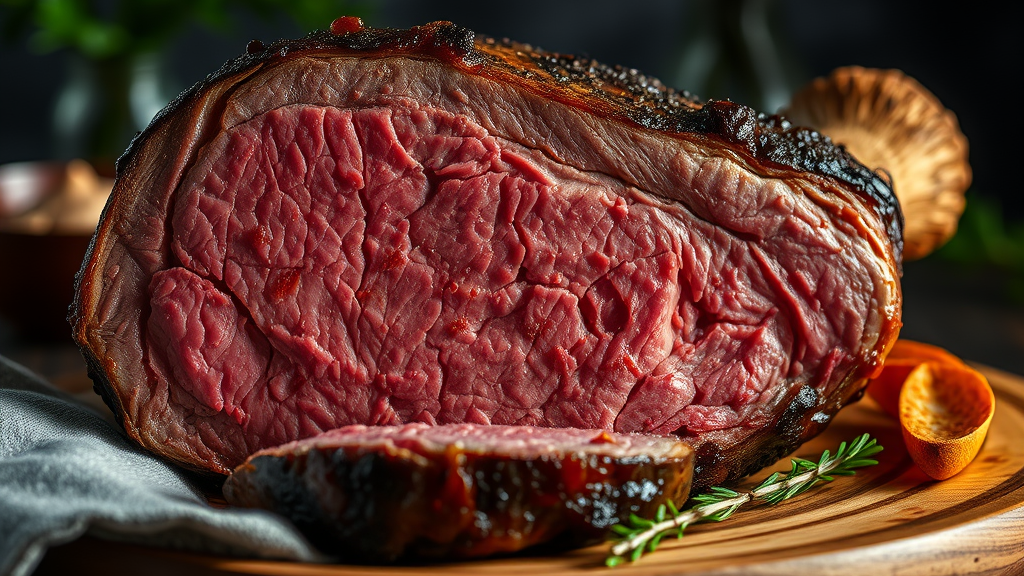
Compared to pricier cuts like ribeye or tenderloin, the beef arm roast is budget-friendly, yet still incredibly flavorful. The muscle fibers in this cut give it a rich, beefy taste that’s perfect for slow-cooking methods. The result is tender, juicy meat without breaking the bank.
2. Versatility in Cooking
Whether you prefer a traditional roast, slow-cooked stew, or shredded beef for tacos or sandwiches, the beef arm roast can do it all. This cut is perfect for braising, roasting, or slow cooking, which allows you to experiment with different flavors and cooking techniques.
3. Tender Texture When Cooked Properly
Although the arm roast can be tough if overcooked, when prepared using low and slow methods (like roasting or braising), it becomes incredibly tender and juicy. This makes it an excellent choice for dishes that require long cooking times, such as pot roast or beef stew.
4. Great for Feeding a Crowd
If you’re hosting a family gathering or a dinner party, the beef arm roast is an excellent choice because it’s large enough to feed multiple people. You can easily scale the recipe up or down depending on your needs, and it’s easy to serve with a variety of sides.
5. Leftover Potential
One of my favorite things about making a beef arm roast is that it makes amazing leftovers. Whether you enjoy it sliced with potatoes the next day or use it to make beef sandwiches or tacos, you’ll have plenty of options to turn your roast into a second meal.
Step-by-Step Guide: How to Cook Beef Arm Roast
Cooking a beef arm roast is surprisingly easy when you break it down into simple steps. Below is a detailed, easy-to-follow guide to help you make the perfect roast, every time.
| Step | Action | Details |
|---|---|---|
| 1. Preheat Your Oven | Set the temperature to 325°F (163°C). | Preheating the oven ensures that the roast cooks evenly and thoroughly. |
| 2. Season the Beef | Season the arm roast generously. | Use salt, pepper, garlic powder, onion powder, and herbs like rosemary and thyme. You can also add a little olive oil to help the seasonings stick. |
| 3. Sear the Meat | Brown the roast on all sides. | Heat a little oil in a heavy-duty skillet over medium-high heat. Once the oil is hot, sear the roast for 3-4 minutes per side, until a nice brown crust forms. This step locks in the flavors and adds depth to the dish. |
| 4. Prepare the Roasting Pan | Add aromatics to the pan. | In a large roasting pan, place chopped onions, garlic, and carrots. These aromatics will flavor the meat as it cooks. You can also add a little broth or wine to create a flavorful base for the roast. |
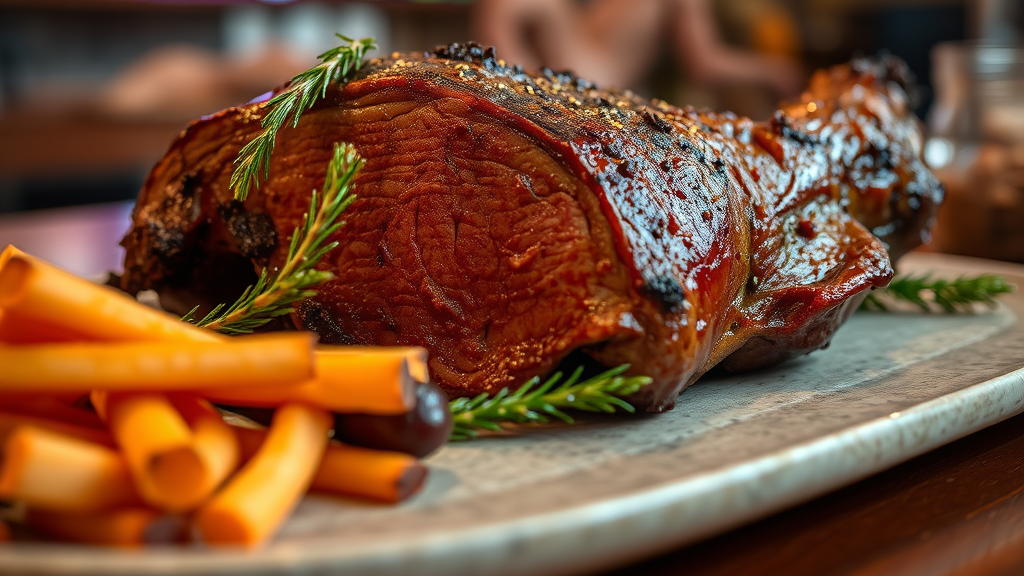
| 5. Roast the Meat | Transfer the roast to the oven. | Place the seared beef arm roast on top of the vegetables in the roasting pan. Roast at 325°F (163°C) for 3-4 hours, depending on the size of the roast. A good rule of thumb is 30 minutes per pound. |
| 6. Check for Doneness | Use a meat thermometer. | To ensure the roast is cooked to your desired doneness, use a meat thermometer. For medium-rare, aim for 135°F (57°C); for medium, 145°F (63°C). |
| 7. Rest the Roast | Let the roast rest before slicing. | Once the roast reaches your preferred temperature, remove it from the oven and let it rest, covered with foil, for 15 minutes. This helps redistribute the juices and keeps the meat tender. |
| 8. Serve and Enjoy | Slice and serve. | Slice the beef against the grain to ensure the most tender results. Serve with roasted vegetables, mashed potatoes, or a simple salad. |
Expert Tips & Tricks for Perfect Beef Arm Roast
To help you get the most out of your beef arm roast, here are some professional tips and tricks to ensure a successful dish every time.
1. Don’t Skip the Searing
While it may seem like an unnecessary step, searing the roast is crucial. It creates a flavorful crust that locks in moisture and enhances the overall taste of the beef. Don’t rush it—take your time to get that nice brown color!
2. Add Some Liquid for Moisture
If you’re roasting your beef arm roast in the oven, make sure to add some liquid to the pan, such as beef broth, red wine, or even water. This helps keep the meat moist and creates a flavorful sauce to serve with the roast.
3. Use a Meat Thermometer
The key to a perfectly cooked roast is to avoid overcooking it. A meat thermometer is your best friend when it comes to achieving the ideal level of doneness. It ensures you get a juicy roast, every time.
4. Rest the Meat After Cooking
Resting the beef after it comes out of the oven is essential for a juicy roast. Let it sit for at least 10-15 minutes to allow the juices to redistribute throughout the meat.
5. Experiment with Marinades
While a simple seasoning blend is often enough, marinating your beef arm roast overnight in a mixture of olive oil, herbs, and vinegar can add even more depth of flavor. Try different marinades to find your favorite!

Frequently Asked Questions (FAQ)
| Question | Answer |
|---|---|
| Can I cook a beef arm roast in a slow cooker? | Yes! To cook it in a slow cooker, sear the roast first, then place it in the slow cooker with your aromatics and liquid. Cook on low for 7-8 hours until tender. |
| What’s the best way to store leftovers? | Leftover beef arm roast can be stored in the fridge for up to 4 days. Be sure to slice it before storing for easier reheating. You can also freeze leftovers for up to 3 months. |
| Can I cook a beef arm roast on the stovetop? | While the stovetop is great for searing the roast, it’s not ideal for cooking the entire roast. To achieve tender, juicy beef, slow roasting in the oven or slow cooker is recommended. |
| How can I make my beef arm roast more flavorful? | Add more herbs and spices to the seasoning mix or marinate the roast overnight. Experiment with different aromatics like garlic, rosemary, and thyme to add depth of flavor. |
| Can I use this recipe for other cuts of beef? | Yes! This recipe can be adapted for other cuts like chuck roast or brisket. Just adjust cooking time according to the size and thickness of the meat. |
Conclusion
Cooking a beef arm roast is a simple yet satisfying way to create a flavorful and hearty meal. With a little prep work and some patience, you’ll have a tender, juicy roast that’s perfect for feeding a crowd or enjoying as leftovers throughout the week. Plus, it’s a versatile cut that works well for various cooking methods, making it a great option for any occasion.
So, next time you see a beef arm roast at the butcher’s, don’t hesitate to grab it. With this step-by-step guide and expert tips, you’ll be able to create a delicious, comforting dish that everyone will love. Give it a try and enjoy the rich flavors of a perfectly cooked roast!
Ready to try more recipes like this? Check out our website is the perfect place for you! or your cooking journey to keep your cooking inspiration going. Happy cooking!